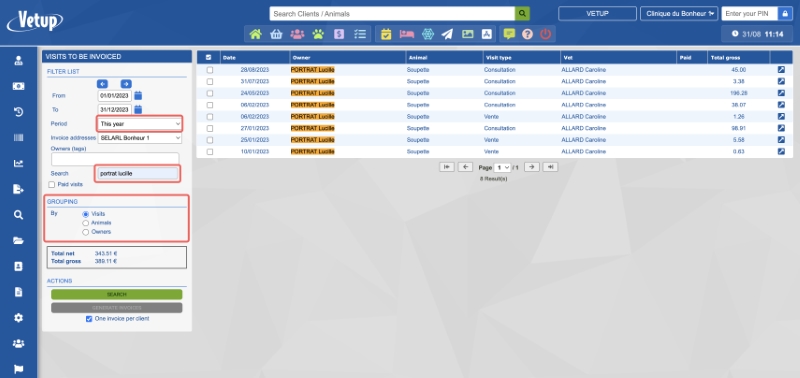
If you wish to generate all invoices for a client over a specific period (for instance, if you work with breeders or shelters and provide them with their invoices once a month…),
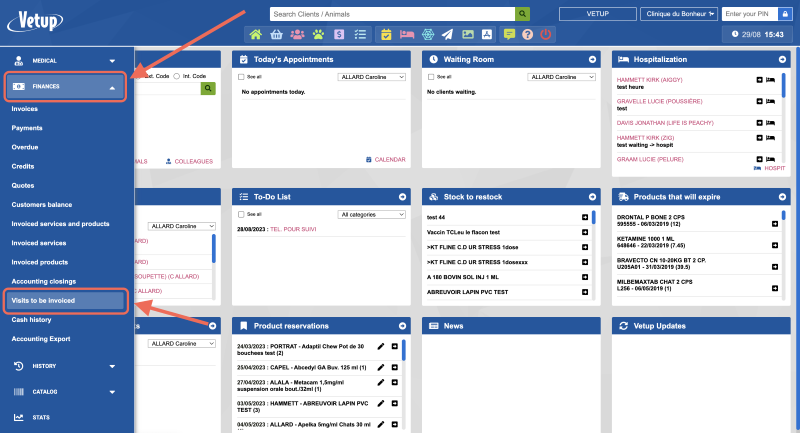
Click on « finances« / « visits to be invoiced«
Enter the relevant period and the client’s name in the “search” field.
Check the boxes of the invoices you want to create.
You then have 2 options:
If you click on « Generate invoices« , one invoice per visit will be generated (in this example, the creation of 8 separate invoices)
If you check the box « one invoice per client » before clicking « Generate invoices« , a single invoice combining the different visits that have not been invoiced yet for a client will be generated (in this example, a single invoice combining the visits from 01/01/23 and 31/12/23 will be generated for the client Lucille Portrat).
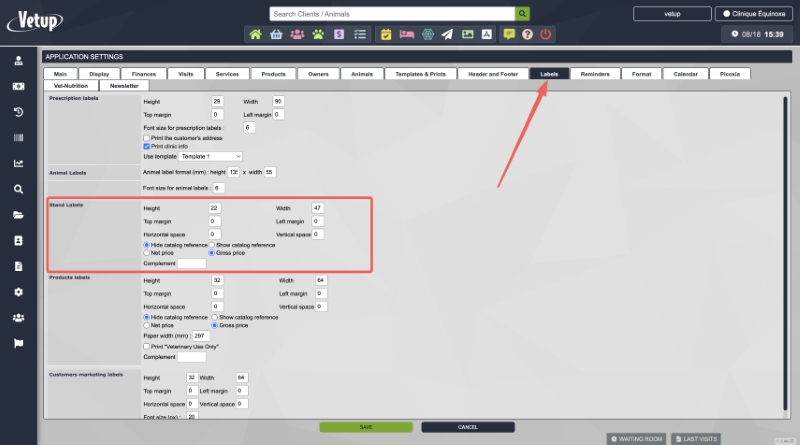
You can generate labels for attaching to your display racks (such as those for pet food, for instance).
Start by configuring the size of your labels in Settings / Application Settings / Labels.
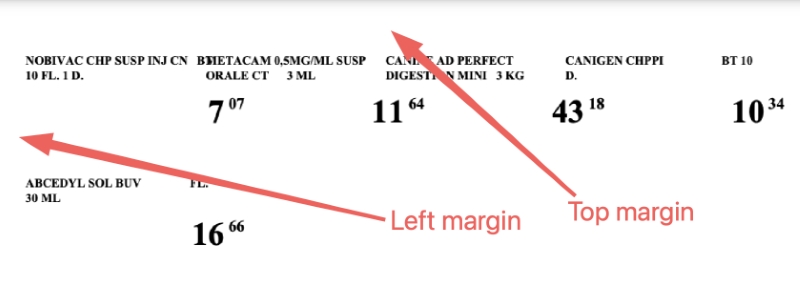
Be sure to include the margins of the label sheet and any spacing between
You can also specify whether you want to display the product reference, its price excluding taxes or including taxes, etc.
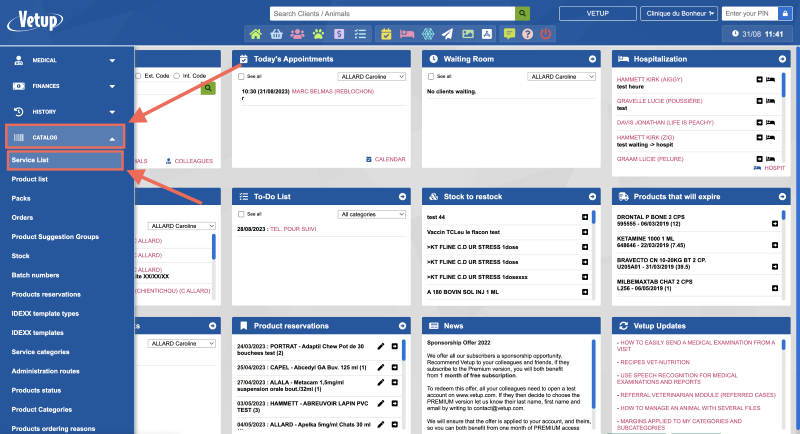
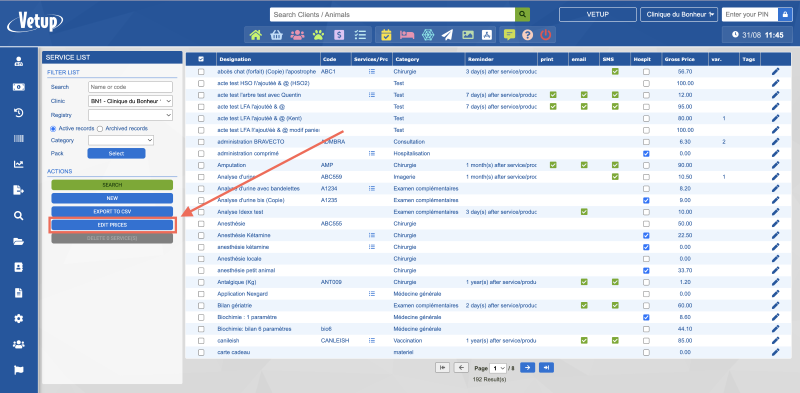
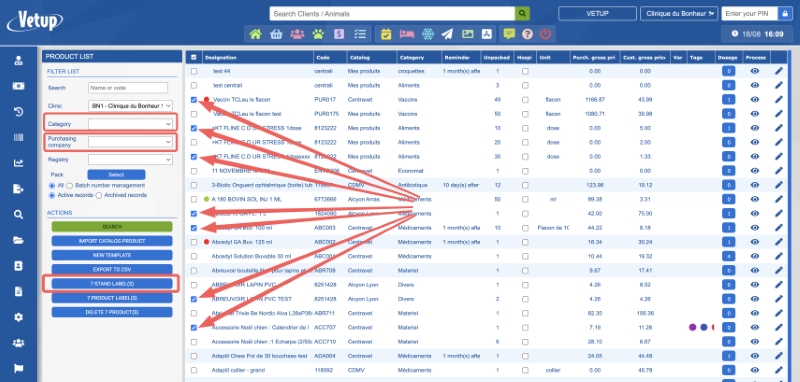
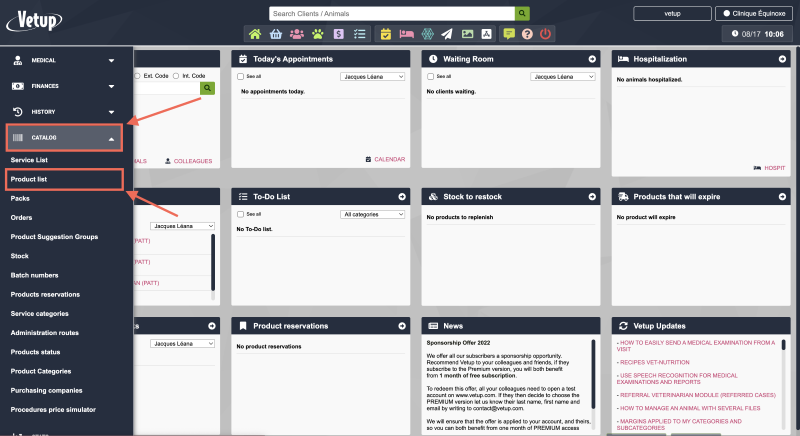
To print these stand labels, go to Catalog / Product List.
Specify if you want a particular category or registry.
Check the boxes of the products you want to print a display label, then click the ‘x stand label(s)‘ button « x being the number of products you selected« .
Remember to select the printer designated for your labels if you have multiple printers based on the type of documents to be printed.
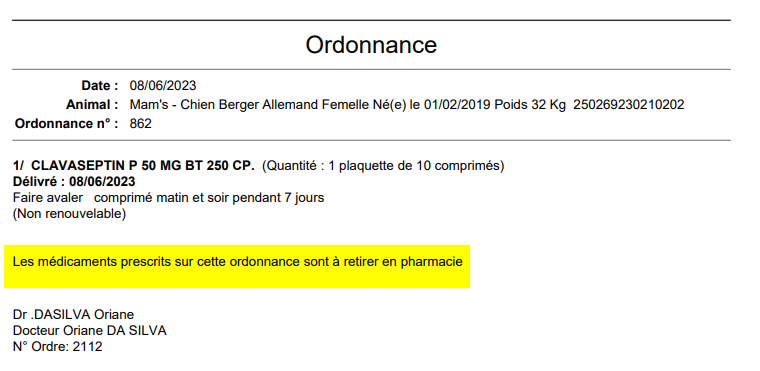
Voici comment ajouter des conseils, des modèles prés établis, des conduites à tenir, des informations utiles sur le bas d’une ordonnance.
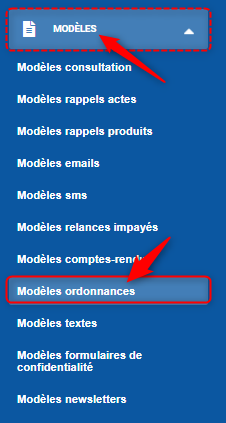
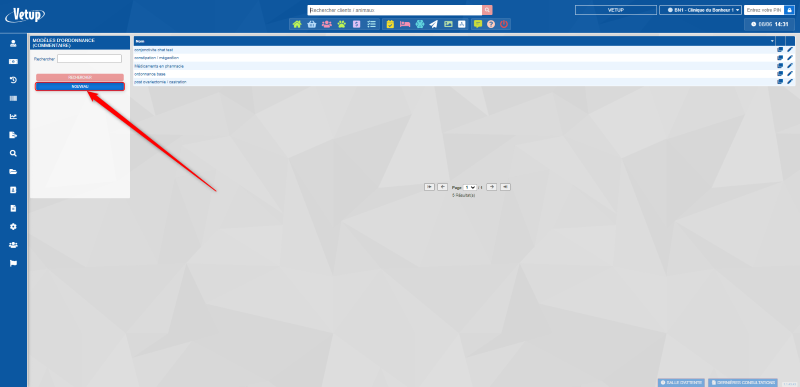
Ouvrez le menu « Paramètres/Modèles ordonnances » et cliquez sur le bouton « Nouveau » ou modifiez un modèle existant
Pour cet exemple, on crée un modèle pour les ordonnances ne contenant que des des médicaments à récupérer en pharmacie humaine.
On ajoute :
le titre : pour cet exemple, on ajoute « Médicaments en pharmacie »
un code
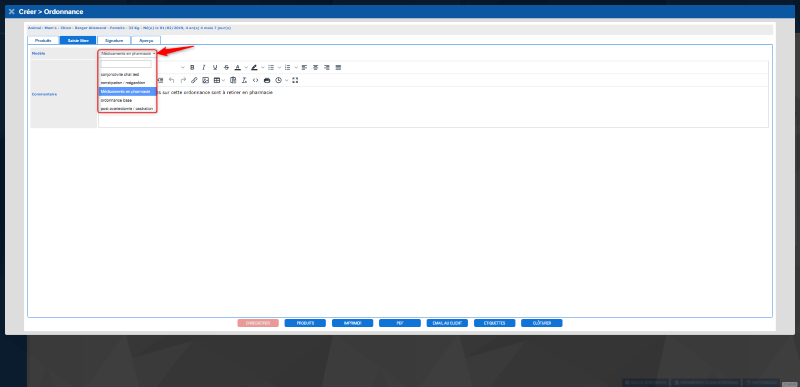
le commentaire : pour cet exemple, on ajoute la phrase « Les médicaments prescrits sur cette ordonnance sont à retirer en pharmacie humaine ».
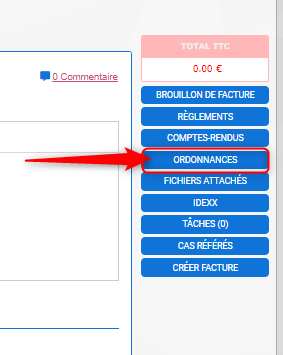
Dans la visite, après avoir ajouté les produits dans le panier, cliquez sur le bouton « Ordonnances » et validez les produits que vous voir sur l’ordonnance
puis sélectionner le modèle que vous avez créé qui vous intéresse (ici, « Médicaments en pharmacie » )
Vous pourrez ensuite imprimer et/ou envoyer cette ordonnance par email à votre propriétaire.
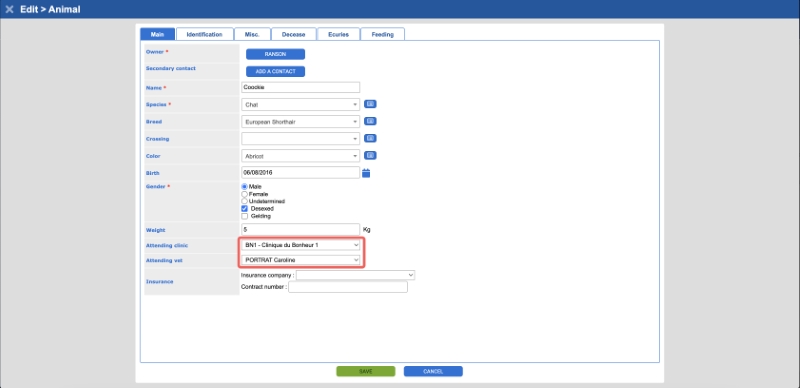
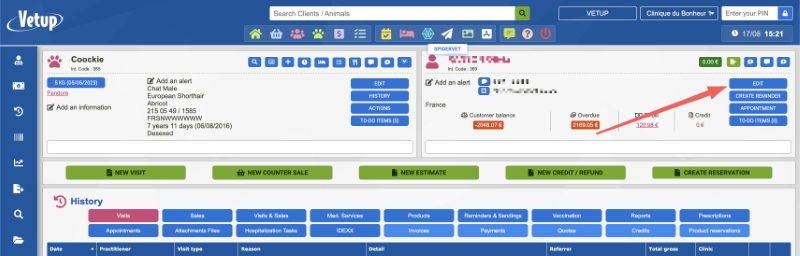
During the initial consultation of an animal, the clinic where the visit took place and the veterinarian who conducted the visit will be added to the animal record and the owner’s record as the reference clinic and attending veterinarian.
Here, the animal was visited at the ‘clinique du bonheur’ and was attended for its first visit by Dr. Portrat, who was recorded as its attending veterinarian.
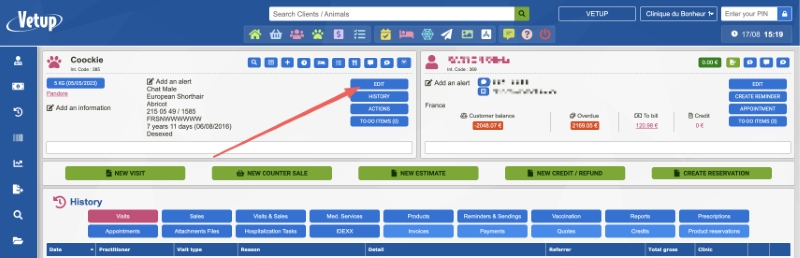
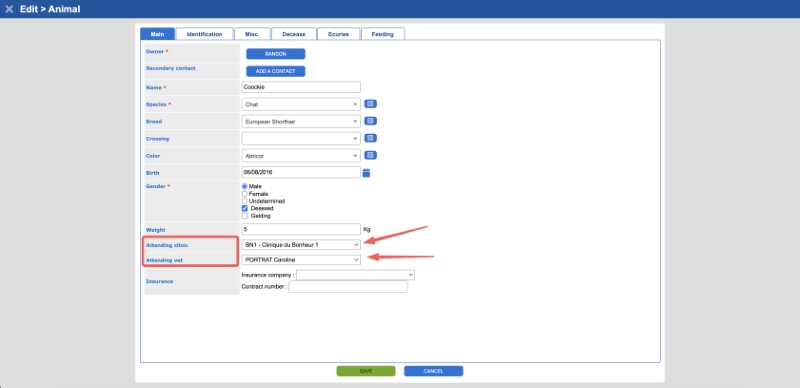
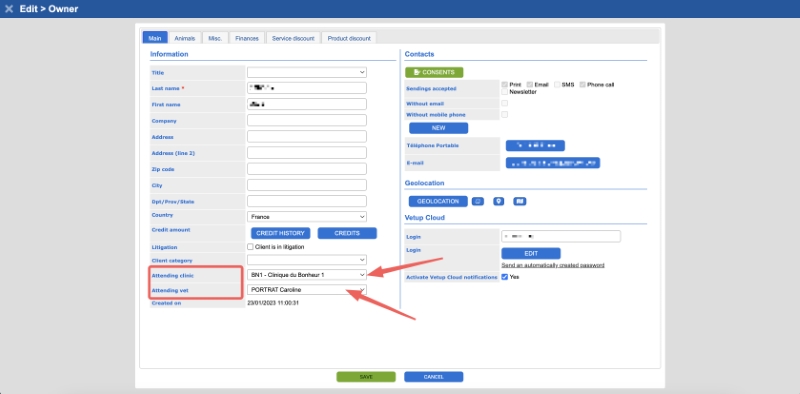
You can modify these details if needed in the animal record / edit / ‘Attending clinic‘ and ‘Attending vet‘ fields, then save
And in the client record / edit / ‘Attending Clinic‘ and ‘Attending vet‘ fields, then save
If some of your products do not have barcodes (for example: toys, leashes with no barcode, or products you make yourself), you can request to create a random barcode for that product.
Click on Catalog, then Product List.
Open the product template and click on Generate Product Code.
A product code will be generated immediately.
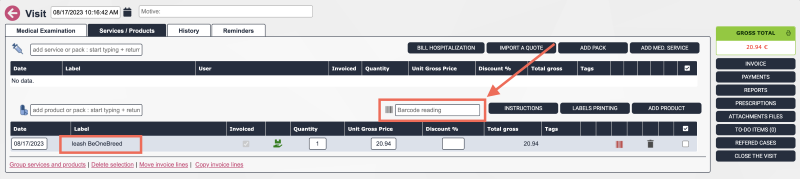
If you print ‘stand’ labels or ‘product’ labels for this product, a barcode will now be included.
This barcode will then be recognizable by your scanner or barcode reader, allowing you to add this product to an invoice for a visit or sale. »
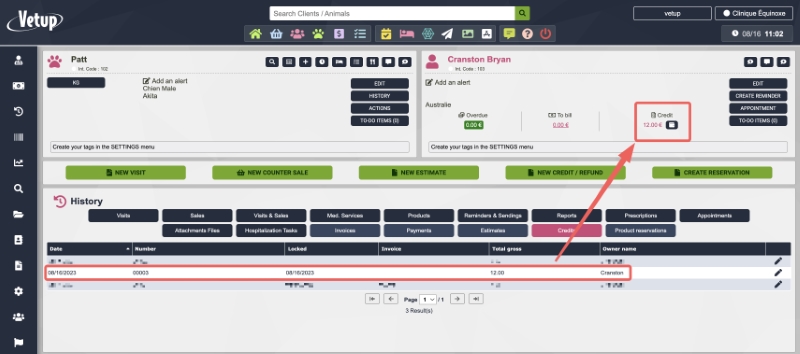
Just like with recorded invoices, you cannot delete a credit note once it has been closed.
However, you can correct it using an invoice (similar to how you would correct an erroneously issued invoice with a credit note).
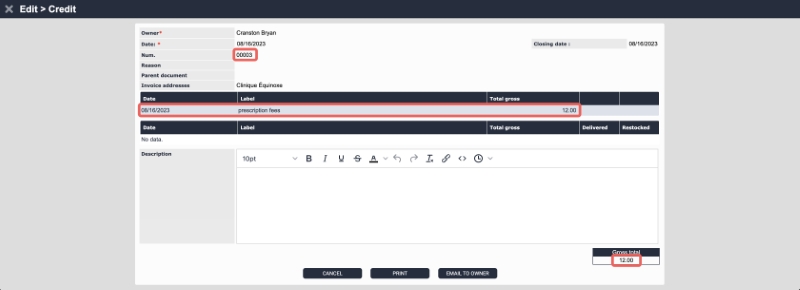
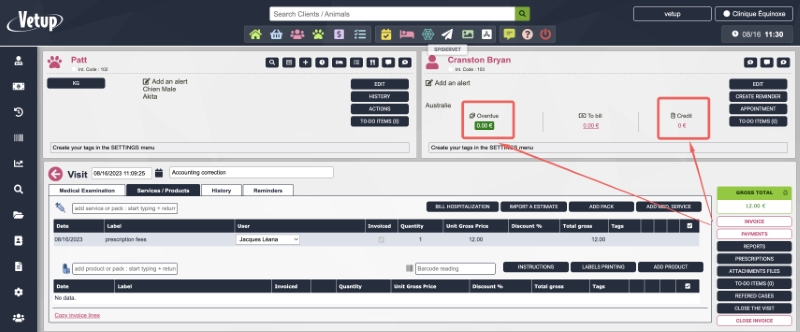
Example: Mr. Cranston has a credit note of $12 for prescription fees.
This credit note was created by mistake and you want to delete it.
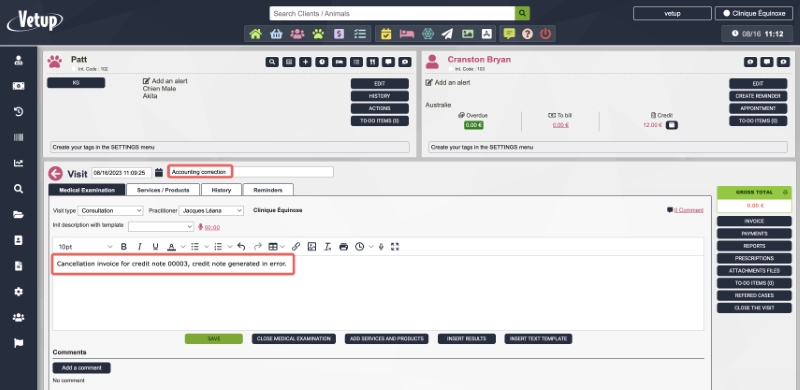
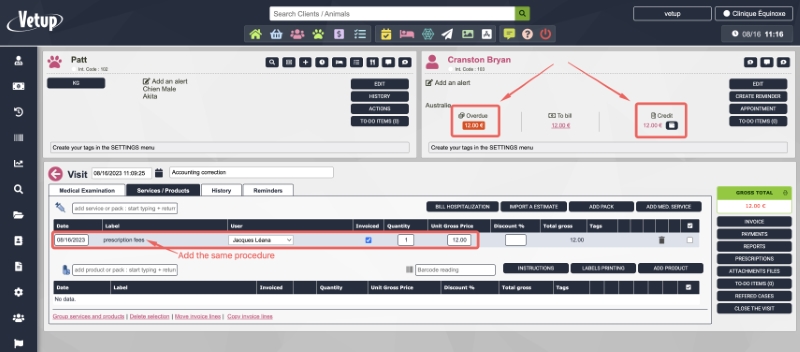
You will generate a credit note cancellation invoice through a new visit with the same act (service), along with the reason for creating this consultation line.
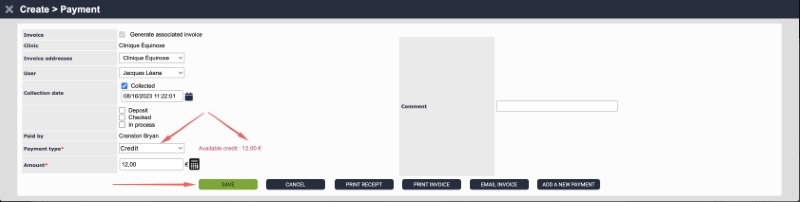
Now you have an outstanding balance of $12 as well as a credit note of the same amount.
All that is left is to record a payment with the ‘credit note’ payment method.
This way, the client’s balance is back to $0, he no longer has outstanding balances or credit notes (since the credit note has been cleared by the previously generated invoice), and there will be no duplicate VAT entries in the accounting.
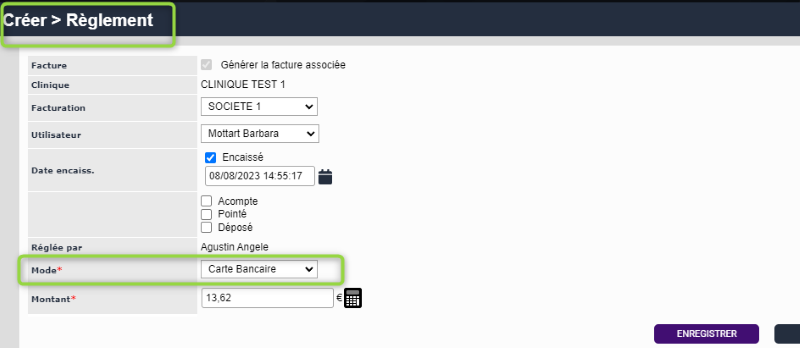
Lorsque vous voulez effectuer le règlement d’une visite, il est possible de faire apparaître un mode de règlement par défaut dans la case « Mode »
Dans l’exemple de la capture ci-dessous, le mode de paiement par défaut est par Carte Bancaire
Nous vous rappelons que vous pouvez créer de nouveaux modes de règlements dans Paramètres/Modes de paiement puis, en cliquant sur le bouton « Nouveau »
Cette vidéo vous indique comment paramétrer ce mode de paiement par défaut.
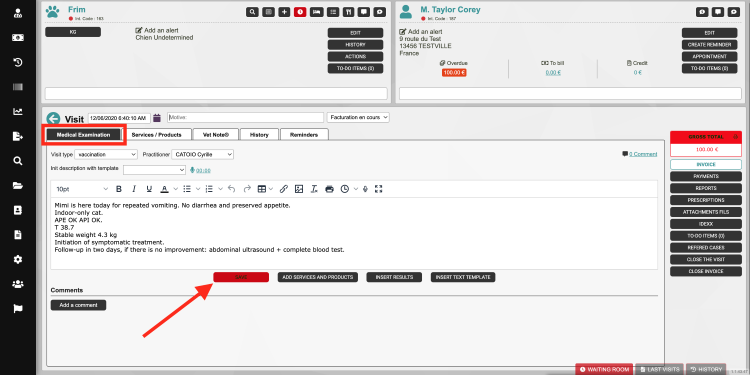
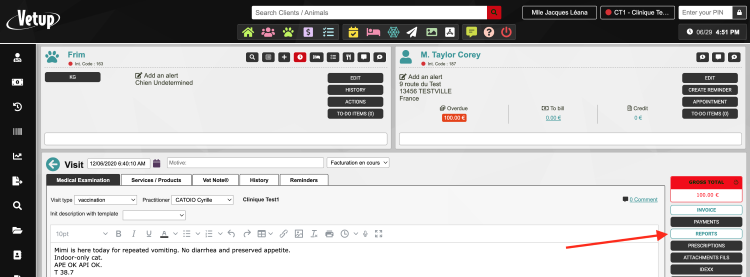
It is now easier to generate a report containing your medical examination directly from your visit.
Here is how to do it :
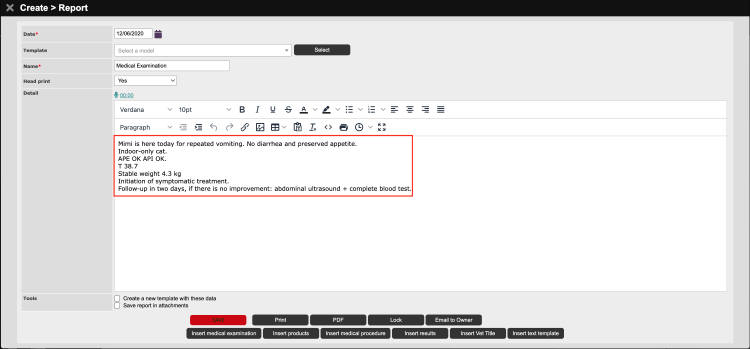
When you have finished writing your medical examination, click on the “Save” button
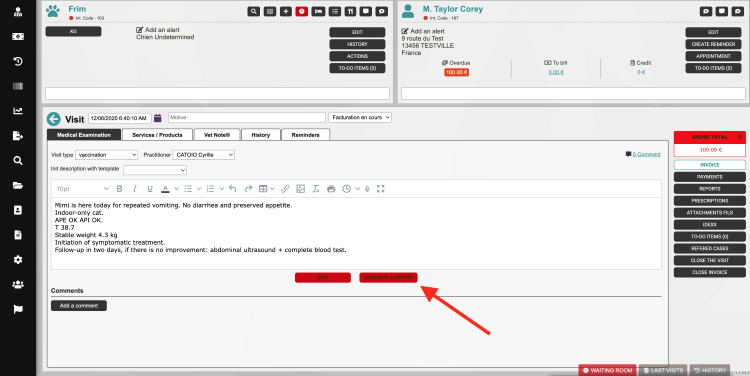
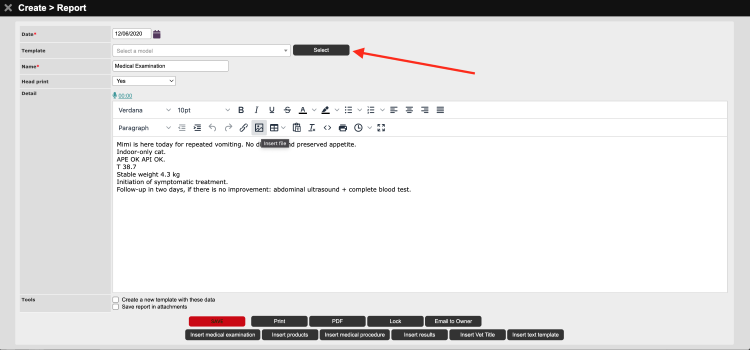
The new « Generate a report » button appears:
This functionality allows you to generate a report based on the previously filled medical examination.
Caution: Using a template in this situation may overwrite your existing medical examination.
→ Do not use a report template if you have not integrated the merge field « (medical examination) ». In that case, the template would replace your medical examination, and you would need to start the report again.
→ You can use a report template if the merge field « (medical examination) » is present. Then, your medical examination will be inserted, at the desired and configured location, into the report template.
Before saving, you can print, create a PDF, or send your report via email to your client.
Upon saving the report, it will be automatically stored in the « Reports » tab located on the right side of the screen. »
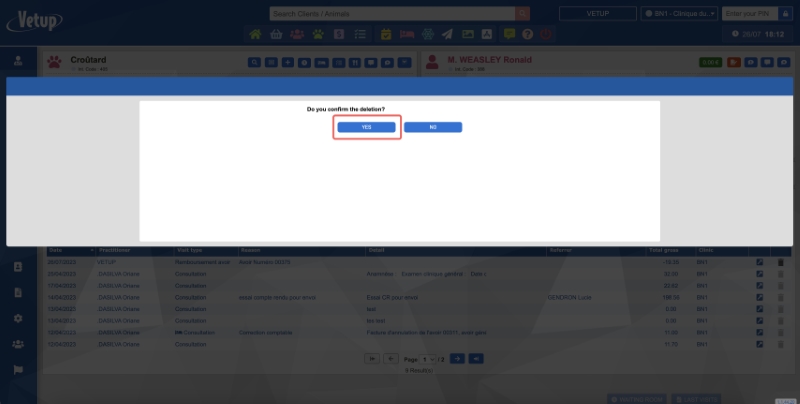
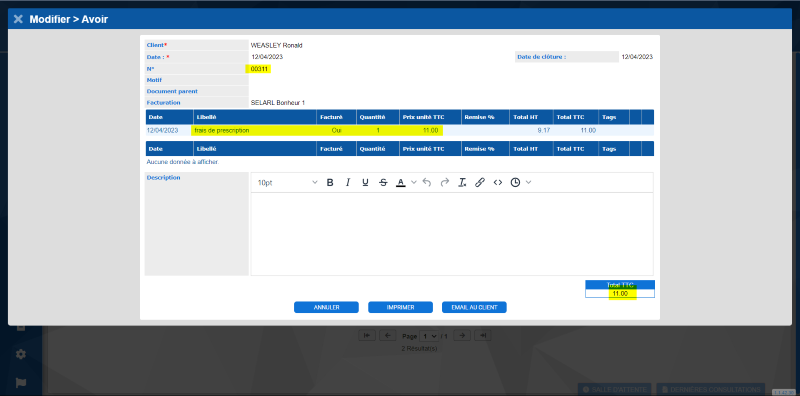
Comme pour les factures enregistrées, je ne peux pas supprimer un avoir une fois qu’il a été clôturé.
En revanche, je peux le corriger à l’aide d’une facture (tout comme je vais corriger une facture éditée par erreur à l’aide d’un avoir)
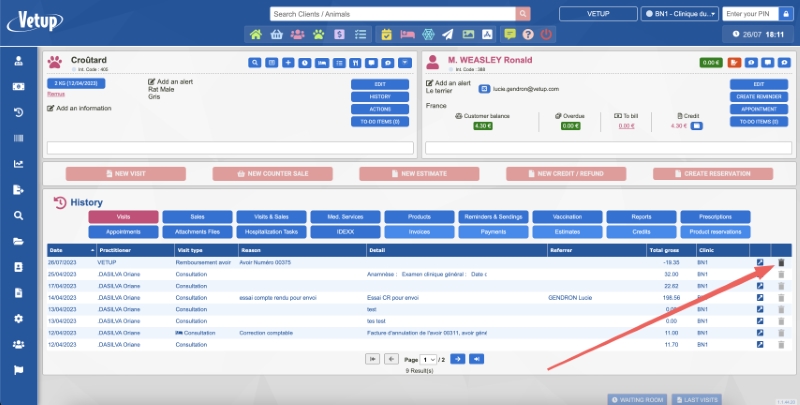
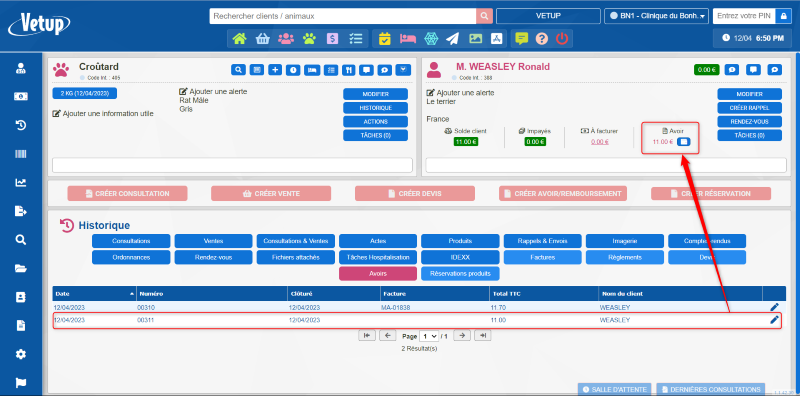
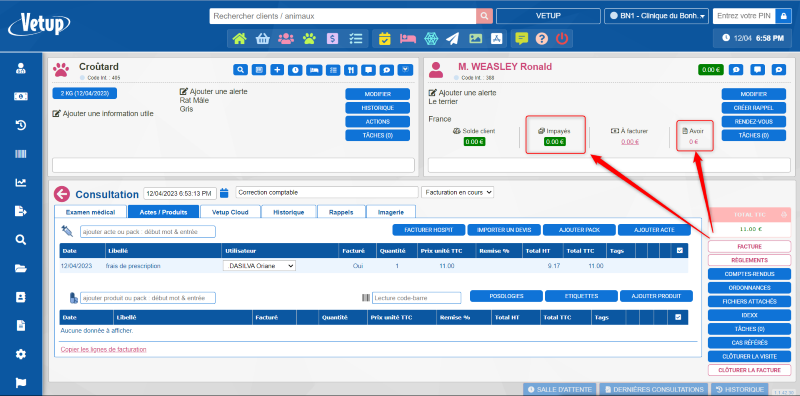
Exemple : Mr. Weasley a un avoir de 11€ pour des frais de prescriptions.
Cet avoir a été créé par erreur et je souhaite le supprimer.
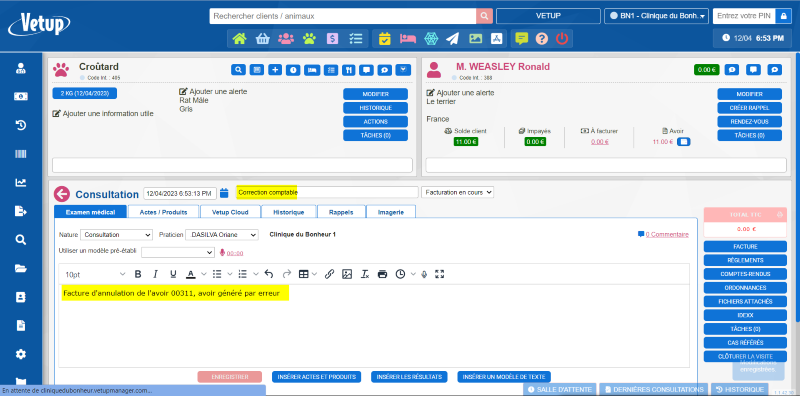
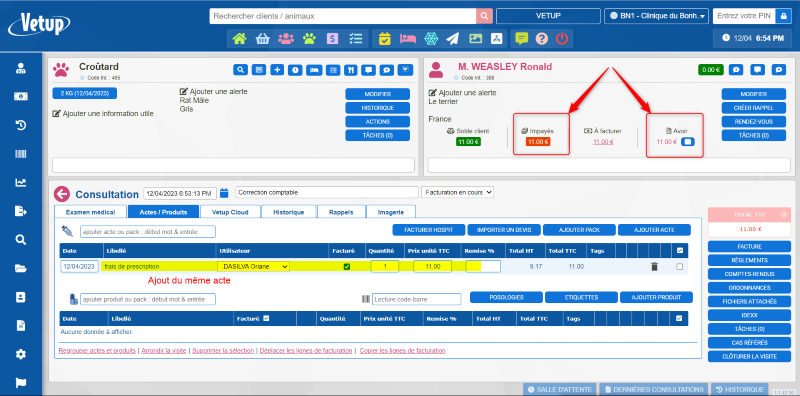
Je vais générer une facture d’annulation d’avoir via une nouvelle visite avec ce même acte, et le motif de la création de cette ligne de consultation
J’ai à présent un « impayé » de 11€ ainsi que l’avoir du même montant.
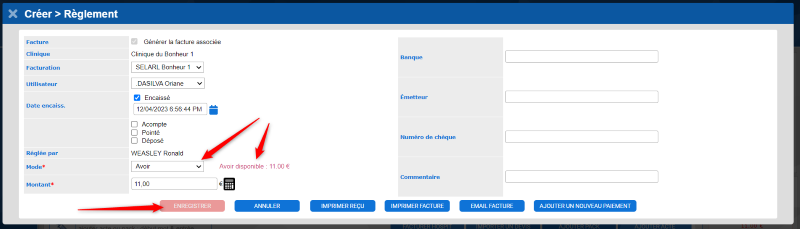
Il suffit maintenant d’enregistrer un règlement avec le mode de paiement « avoir »
De cette façon le solde du client est de nouveau à 0€, le client n’a plus d’impayés ni d’avoirs (puisque l’avoir a été soldé par la facture générée précédemment) et il n’y aura pas de doublon de TVA dans la comptabilité.
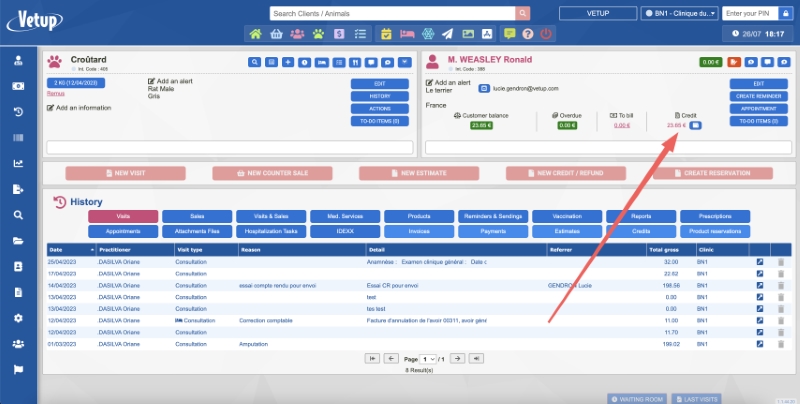
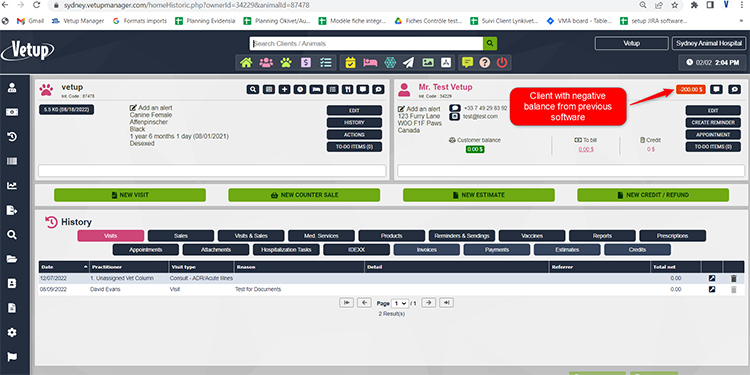
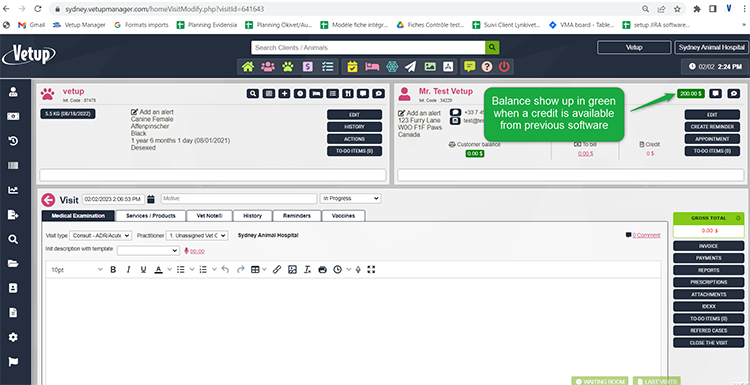
When a debit or a credit is imported in Vetup from a previous Software the total amount is displayed on the right top corner of the client file.
If It’s a debit it is displayed in red and if it’s a credit, in green.
If the Balance displays 0, it means the client is not concerned or that debit or credit has already been recovered/used.
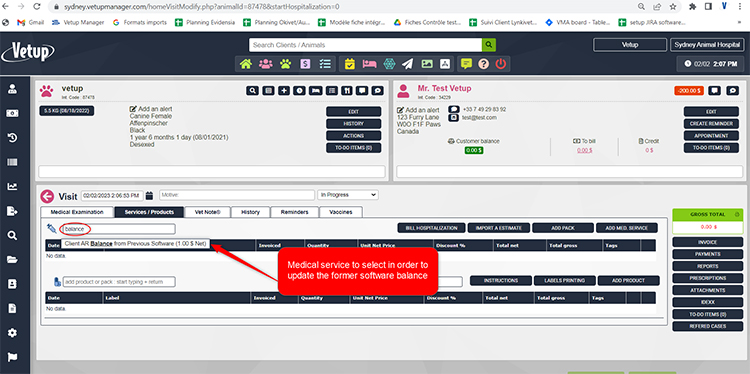
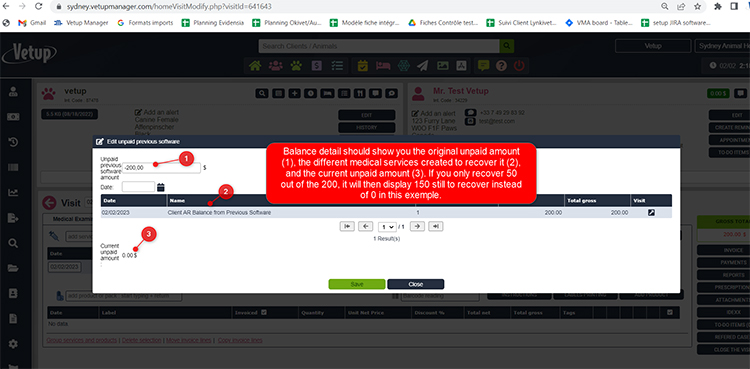
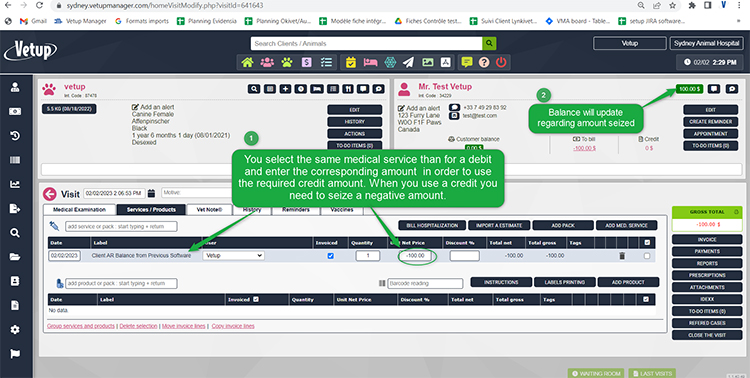
When facing a debit and if you want to recover it partially or totally please follow the steps below.
When facing a credit and if you want to use it partially or totally, please follow the steps below
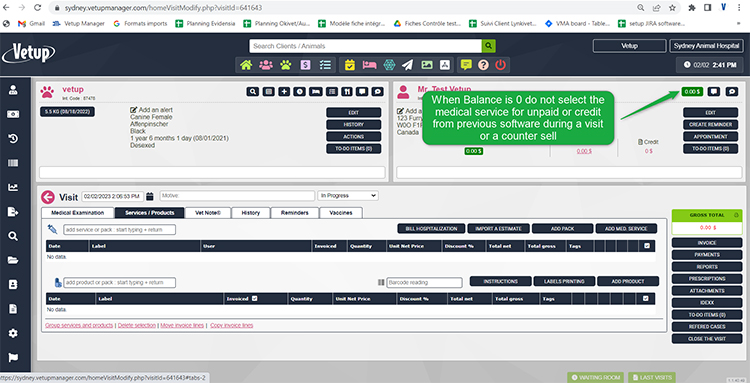
When balance is 0 do not use “Client AR Balance from Previous Software” medical service
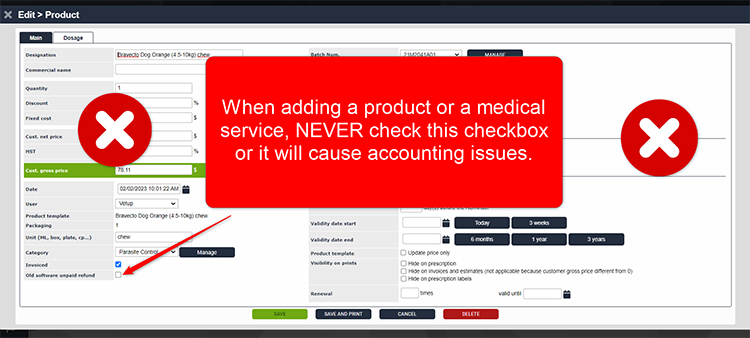
and DO NOT CHECK the checkbox below for any medical service or product details
Nous utilisons des cookies pour optimiser notre site Web et nos services afin répondre au mieux à vos attentes.
Fonctionnalité
Toujours activé
The technical storage or access is strictly necessary for the legitimate purpose of enabling the use of a specific service explicitly requested by the subscriber or user, or for the sole purpose of carrying out the transmission of a communication over an electronic communications network.
Préférences
Le stockage ou l’accès technique est nécessaire dans la finalité d’intérêt légitime de stocker des préférences qui ne sont pas demandées par l’abonné ou la personne utilisant le service.
Statistiques
Le stockage ou l’accès technique qui est utilisé exclusivement à des fins statistiques.The technical storage or access that is used exclusively for anonymous statistical purposes. Without a subpoena, voluntary compliance on the part of your Internet Service Provider, or additional records from a third party, information stored or retrieved for this purpose alone cannot usually be used to identify you.
Marketing
The technical storage or access is required to create user profiles to send advertising, or to track the user on a website or across several websites for similar marketing purposes.